Quantcast
Channel: Free Resources – Nerd or Die
Viewing all 27 articles
Browse latest View live

Youtube Thumbnail Maker App

$
0
0

Check out this easy to use YouTube thumbnail maker. It allows you to create great looking thumbnails in just a couple of minutes. While it’s designed to create images for YouTube, you could even use this as a Twitch Offline Image maker as well!

Launch Thumbnail Generator

I want to give a quick shout out to Orels1, a member of the Nerd or Die Discord. Orels created this app and allowed me to share it with everyone.

Using the YouTube Thumbnail Maker App

This post will serve as a walk through for the app, you can launch the full app by clicking here. First, we need to either drag and drop an image into the app, or you can even click inside the box and select an image like normal. Select an image you’d like to use for your background and we’ll see it be loaded in. I recommend using an image that is 1920 x 1080 pixels to start with, or one that is 16 by 9 in aspect ratio, such as 1280 x 720 pixels. If you use a different aspect ratio the thumbnail maker will automatically adjust and scale the image to fit the recommended size for YouTube thumbnails.


YouTube Thumbnail Maker App

When we scroll down we’ll see a preview of image on the left and if you hold the F key on your keyboard, the thumbnail will scale up to fit the screen to give us a better idea of how everything is looking.

Background Image Options

The first option sets in the Youtube Thumbnail Maker will be for your background. The overlay opacity will control how much of the color we selected in the overlay color option shows through. Think of this like a color tint that you can apply to your background image. This can be useful when you want your text to stand out a bit more. You can use the color picker to change the color in multiple ways. You can even see the hex code or RGB values of the color here as well.

Next, is the vignette. Think of this as a gradient that comes in from the corners. Adjust the opacity and size of your vignette can produce some very nice looking effects. Remember, you can scroll back up to get a better look at how your thumbnail is turning out.

Background and Frame Options

Frame Options

Let’s move onto the frame options for our Youtube Thumbnail Maker. Here, we can set a frame size, or thickness, for a frame. We can adjust the frame padding, or distance from edge of the border of our image, and we can select a color for our frame as well.

Title Options

Now we can add in some text options. Both the title options and subtitle options sections work in the same way. Let’s start by adding in some text for our title and adjusting the font size a bit as needed.

You’ll notice some alignment buttons on each side of where you can input your text. We can left, middle, or right align our text as needed. The other set of buttons allow us to adjust the text to be vertically aligned in the top, middle, and bottom of the image. If you want a bit more of precise control over the positioning of these text titles, you can also use the horizontal and vertical shift sliders to better position your thumbnails.

Title Options

A future option we’ll consider adding in is font style selections. These will allow you to customize your thumbnails even further. Make sure to let us know any recommendations you’d like to see added by commenting below. Finally, there’s color selections for both the title and subtitle options.When you have the perfect title positions, sizes, and colors, we can add in a branding image.

Adding in a Branding Image

This works in the same way as adding in our background image, where we can simply drop an image into the app, or click inside the box and select our image. If you don’t want to use a branding image, then you can of course skip this step.

We can set what side of the image we’d like to align our branding image to. Let’s say we wan to align our image to the bottom right, we can simply click the right button, and then the bottom button. We can adjust the offsets of the horizontal and vertical positions as well. This will allow us to make sure our branding image is exactly where we’d like it.

Branding and Saving YouTube Thumbnail

We can adjust the opacity of this image, if we’d like to give it a watermark effect, as well as the overall scale of the image, to make it bigger or smaller. Let’s hold the F key to pay some respects and see how the image looks so far.

When you’re all done, simply hit save result. The image will be downloaded onto your computer.

The post Youtube Thumbnail Maker App appeared first on Nerd or Die.


Free Overwatch Twitch Panels

$
0
0

We’re very excited to bring you our newest free resource – Overwatch Twitch Panels! With this free resource you can customize and save your own unique panels, using only a web browser. We designed this with our Animated Overwatch Overlay and custom notifications in mind, so if you’re using those, it should fit in nicely with your stream design.


Having trouble viewing this app? Click Here.


How to Customize Your Overwatch Twitch Panels

  1. You can watch the video at the top of this post or read the instructions below to design and customize your panels.
  2. When finished, use the filename input and download button to save your panel to your computer.
  3. Enjoy! You can now upload the saves file to your Twitch page.

Example Panel Designs

Free Overwatch Twitch Panel Free YouTube Twitch Panel Free Instagram Twitch Panel Free Steam Twitch Panel Free PayPal Twitch Panel Free Xbox Twitch Panel

Options Available for the Overwatch Twitch Panels

  • Icon color – Click inside the color selector box to choose the color of the icons. Palette colors are available on the left side. The right side has options for color slider boxes to get a more unique color. You can also use the input box below to enter in an exact color hex code if you’d like. For example, #FFFFFF will yield white.
  • Text color – This works just like the icon color option, but controls the color of the text on the panel. It is recommended to choose a color that has contrast with the background. This will make it easier to read.
  • Background color – A drop down option that allows you to select different background panel designs. More color options maybe be added in the future. Let us know what colors you’d like to see in the comments below.
  • Badge color – A drop down option that allows you to choose a color for the area surrounding the icon. Again, there is only a few options here – so make sure to check back for any updates to this if the color you’d like to see isn’t added just yet.
  • Panel text – A text input box allows you to set what the text says. When designing panels it is usually recommended to startwith the longest word, in order to keep text sizes uniform.
  • Icon dropdown – I can simply select the Twitter, and it will swap in the Twitter icon. You’ll probably notice a list of icons – but please let me know if you think we left any out that are important to streamers. I made sure to put in a “blank” icon – for all of you that use Photoshop, Gimp, or similar, and want to take this design to the next level. We also included a Nerd or Die icon in the list – in case you’d like to credit our site or YouTube channel in anyway, we always appreciate that.
  • Font Family – A text input box that allows you to set the font to use for your panel text. By default Oswald is entered here. Any font installed on your system will work in the input box. Please note that it spaces are generally not required and maybe cause your font to not load properly. For example, if you install the font Big Noodle Titling on your system, the correct input will be BigNoodleTitling – you may need to restart your browser with any new fonts used.
  • Text Size – Range slider input that increases or decreases your text size.
  • Text Horizontal Align – Range slider input that changes the horizontal positioning, or left and right positioning of the text. By default it’s set to 130px.  With italic text you may want to move the input down just a bit.
  • Text Vertical Align – Range slider input for the vertical, or up and down, positioning of the text.
  • Filename and Download Button – A text input and button. You can save the file by entering a filename in this last text box, and then hitting download. For example, if you enter twitter into the text input box and hit download, we’ll have a file named twitter.png saved on our computer. If you’re experiencing any issues with the download button, you can also right click the panel, and click “save image as…” but of course using the button with the filename is recommended.

Have any recommendations or issues with the app? Let us know!

We’d love to improve this app even further so feel free to comment on this post to let us know what you think is missing! Please leave any troubleshooting issues in the comments below, as others may have similar problems. Let us know what icons and color combinations are missing… or perhaps we might even do new badge styles as well!

The post Free Overwatch Twitch Panels appeared first on Nerd or Die.

Call of Duty: Infinite Warfare Free Overlay

$
0
0

Our next free overlay is now live! This time, it’s free Call of Duty: Infinite Warfare overlay – which was designed to work for other first person shooters as well! In this post, we’ll also take a look at the animated version – which is available in the Nerd or Die shop.

Download our Free Call of Duty: Infinite Warfare Overlay

If you’ve followed this site for a while, you probably know how to get a hold of all our free resources, but if not, you can head over to the shop to find our free downloads. The two newest items are the Call of Duty: Infinite Warfare overlays. While, they’re themed for Call of Duty, I still think they could work for a wide variety of streamers, as they have a nice clean look to them.

The non-animated version is available as a pay what you want item, and as always with these items, please feel free to enter 0 for the amount and use as you’d like. The animated version will be available for a low cost, and you can also use the promo code youtube15 to save on the purchase.

All CoD Items cam_hd-social panels_toptipper cam_hd-social_animated socialbar_isolated_animated cam_sd_animated

Anyways, once you decide on the version you’d like, you’ll go through a simple checkout process and then be presented with a download page. You’ll also receive an Email within 5-10 minutes that you can save in case you need to re-download in the future.

Click the links of the files you’d like to download, open up OBS Studio and let’s set up our scenes.

Setting Up the free Call of Duty: Infinite Warfare Overlay in OBS Studio

First, make a new scene for just the overlay, which I’ll name appropriately. For the images it’s extremely simple to add in parts of the overlay. Simply right click and add an image source. Select the file you’d like to add in, and that’s pretty much it! If you need to, you can use the product page to view what each file looks like.

The Supporter Panels

The panels were designed to give you freedom on where you’d like to place everything. They can be stacked horizontally or vertically as needed. I recommend putting them some place where they won’t cover up any in-game action if possible. From here, you can add text sources like normal, that link to your recent tipper, follow, or subscriber files.

Setting Up the animated Call of Duty: Infinite Warfare Overlay

The animated Call of Duty: Infinite Warfare overlay files work in a very similar fashion. Let’s go ahead and right click and add a media file. This time I’m going to pick a webcam animated file, and then make sure loop is selected. Once added in, you can move it around as needed. Like almost all sources in OBS, you can resize by clicking and dragging the red box. If you make any mistakes in scaling the source, you can simply right click and go to Transform > Reset Transform. Don’t forget, if you need more precise options, you can also right click and go to Transform > Edit transform. This will allow you to enter in exact numbers for scaling, which can make it easier to get different sources sized the same, or positioned appropriately.

exampleanimation-callofdutyiw

This resource also comes with blank panels – which can be used for whatever you’d like. Perhaps you don’t like the wording used on the current panels, you could simply add in a text source over the panel, and put exactly what you’d like. I’ve included a link to a font I recommend installing, if you’d like to get a similar look.

Once you’re done customizing the layout of this scene, you can either add the gameplay source in behind the overlay, or you can add this overlay scene into any other scene. This is quite useful for those that have complicated scene set ups and want to keep everything separated.

Customizing the Look of Your animated or free CoD Overlay

If you’d like to alter the colors of the overlay a bit, you can use a filter on each source by right clicking it and selecting filter. Let’s add a color filter, and I’ll play around with the options a bit to get something that I feel looks good. If all this seems a bit complicated to you, then I highly recommend checking out our OBS Studio series to get yourself up to speed with the software.

Color Filter OBS

Anyways, I really hope you all enjoy this new overlay – please let me know what you think about it in the comments below. If you do decide to purchase the animated version, you can use the code youtube15 for an additional 15% off the overlay product. I’ll also be giving some download codes out from time to time on twitter, so make sure to follow us there.

The post Call of Duty: Infinite Warfare Free Overlay appeared first on Nerd or Die.

Free Scene Maker – Make Your Own Intro, Brb, and Outro Scenes

$
0
0

The free scene maker is now available! It’s been awhile since we’ve released a free resource, but I hope this new free resource makes it worth the wait. With our scene maker, you can create and customize your own intro, be right back (AFK), and outro scenes quickly, easily, and of course for free. You can even make scenes that feature your game play in the background while you wait for in-game queues.

Get the Scene Maker!

What is the Scene Maker?

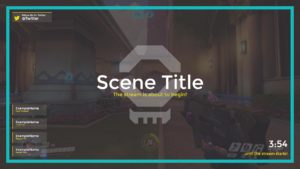
There’s a lot of ways that this product can be used, so let’s take a quick look at what I’m talking about. The default scene design is pictured below. You’ll be able to change out the background video or use an image, update what all the text says, change the fonts, change the colors, and much more. All of this can be done with a couple of easy steps that I’ll explain in this post.

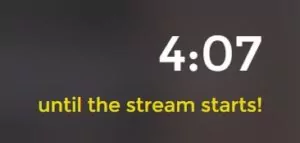
In the top left we have social media popups that will animate and show off your social networks. In the bottom left, you’ll see labels that will display your recent follower, biggest tipper, latest sub and more. The bottom right has a countdown that can be customized to last longer, and display different messages. There’s also a message that displays when the countdown ends! In the middle we have a heading and sub heading that you can change out, and even a logo or brand image which you can add in as well. We’ll use the settings generator to customize all your settings – so it will be quick, easy, and you’ll even be able to make multiple scenes if you’d like!

Scene Maker Default Design

Getting Started

To start, you’ll find this scene maker in our newly laid out Free Resources section. Here, you’ll find all items in our shop that you can use free of charge, such as our panel and overlay makers. Let’s go ahead and click on the scene maker – the direct link is here. Add the item to your cart and go through the checkout process. After you have the files downloaded to your computer, let’s go ahead and unzip them. As you will see, there is a main folder called “Stream Resources” with two other folders inside of it.

Folder Structure


Once everything is extracted we can move on to the settings generator.

Using the Settings Generator

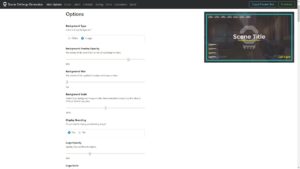
First, let’s start with the settings generator. This is where the real magic happens. In the ‘SceneMaker” folder that we just extracted there’s a link to open up the Settings Generator, go ahead and click that. At the top, you’ll see all the categories of options that you’ll be able to change – you can click these to jump around to different options sets. You’ll also see two buttons on the right. The first will allow you to toggle the size of the preview window to make it larger. You can also click directly on the preview area to toggle its size as well. The second button is to download your settings file, which we will later place in the “Settings” folder. More on that later. You’ll also see a live preview towards the top right. This will give you an idea of what your scene will look like.

Please note that it will contain the default background videos and images – as well as default user names pulled into the labels. We will go over switching these out after we go through the settings that we can change here.

Setting Generator Example

Also, the live preview will cycle through only 1 social network and then the schedule, this is so you can get an idea of what everything will look like quicker.

Options Available

Main Options

Please note that a few items won’t update via live preview. Animations may be interrupted when toggling the display of certain sections.

  • Background Type – Do you want to use an image or video for you background?
  • Background Overlay Opacity – This will allow you to decide how much of the background color is shown. Slide this up to have a more solid color or down for a more see-through.
  • Background Blur – Adds blur to your image or video, if you’d like.
  • Background Scale – Scales up the size of your background image or video. I recommend scaling up a bit if you add blur to the background.
  • Display Branding – Decide if you want to show a logo in the middle or not.
  • Logo Opacity – Changes how solid or see-through the branding image is.
  • Logo scale – Changes the size of your logo.
  • Frame width – Changes how thick the frame around the scene is.
  • Scene Title – The main title of the scene.
  • Tagline – The smaller text underneath the title.

Colors

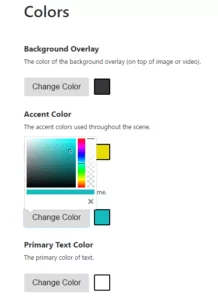
Here, you can use color pickers to decide on what color you’d like to use in the scene maker. Simply click “Change Color” to open these pickers.  The box on the right will display the current color chosen. We’ll see that we can drag around to get what we want, and even adjust the opacity of each item.

  • Background Color – Color on top of the background image. If you’d like a solid background color, you can move this opacity slider all the way up to 100%. Alternatively you can move it down to 0% to have no color on top at all.
  • Accent Color – Used throughout the design. Default is yellow on borders on the labels, for the social media icons and borders, and schedule border as well.
  • Frame Color – The color of the frame.
  • Primary and Sub Text color – Changes the various text colors.
  • Content Backgrounds – Colors behind our label, social media, and schedule areas. Again, you can adjust the level of opacity if you’d like.

Using the Color Picker

Labels

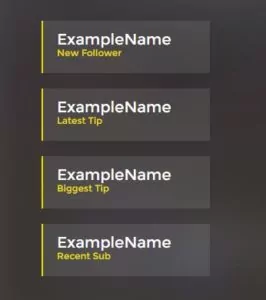
There are a maximum of four labels that you can show at a time with the scene maker. Each one will allow you to change the heading message. For example, you can change “New Follower” to “Latest Follower” or whatever message you’d like it to say.

  • Display Labels – Choose if you want this section displayed or not.
  • Label Headings – The name of each label section. Such as “Recent Follower”, “Top Tip”, “Latest Sub”.
  • Label Paths – Name of the text file to import into the scene. Match the text file names from the Muxy Ticker or StreamLabs Stream Label program.

Supporter Labels

You can hide any label by simply leave the header area for each one blank. I highly recommend only using the text files that provide a single user name, the ones that you would normally have scroll will not work well here.

Schedule

An animated schedule display is built into the scene system. If you don’t have a set schedule, you can use Display Schedule to hide this area completely.

Built In Animated Schedule Display

Here, you’ll be able to set your times for each day of the week. Let’s say you don’t stream on Sundays and Wednesdays, just change the text to say “Off” or something like that. Simply change the text box for each day, to have it be displayed in your scene.

Scaling

This will let you increase or decrease the sizes of each section. Simply move the slider for each respective section you want to change. You may need to wait for the schedule or social media areas to show, to see the changes you’re making.

Fonts

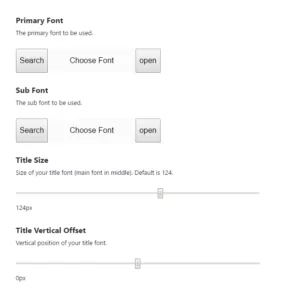
This section allows you to set various fonts to be used, as well adjust their most font sizes and vertical positions.

  • Primary Font – The main font in the scene.
  • Sub Font – The secondary font in the scene.
  • Size Sliders – Changes the size of the font for each respective section.
  • Vertical Offset Sliders – Changes the vertical position of each respective section.

To use the font pickers, click “Search” and you’ll be presented with all the fonts that Google fonts offers – which you can scroll through. To narrow things down you can use the category buttons to select types of fonts you’d like to use.

Font Options

If you’re a bit overwhelmed by the amount of fonts found in the scene maker, you can check out https://fonts.google.com/ to see full directory of fonts available.  It contains featured and the most popular fonts – making it a bit easier to navigate. Then just come back to the settings generator and search for the name of the font you’d like to use. I’ll go ahead and search for Oswald, which is a font I’ve used before, select it, and then click close.

Countdown

The countdown is built into the scene maker and is perfect for intro scenes. Let your audience come in before you do your official greeting!

  • Display Countdown – Show or hide the countdown. Some scenes may not require a countdown.
  • Countdown Time – Time, in minutes, of the countdown to last.
  • Message – Message displayed while the countdown is active.
  • Over Message – Message displayed when the countdown ends.

Countdown

Social Media

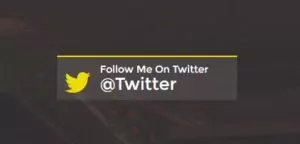
Finally, we have the social media section. This section has built in animations, and will help get your viewers connected with you on Twitter, Facebook, Instagram, and YouTube!

  • Display Social – Show or hide these animations.
  • Network Name – The Name of your media for each respective network.
  • Network Headers – The heading you’d like to show above each respective network. For example “Follow me on Twitter”.

Animated Social Media Popup

You can hide specific networks by making the text boxes blank for any social media popups you don’t want to show.

Adding in Your Settings File

Click the download button to save our settings. If you’d like to make additional settings files for future scenes, you can do so by editing again, and clicking download when finished.

Let’s finish up with this scene. Now that your settings file is downloaded. You’ll need to place it within the settings folder. This file should be the only file located here. It’s full file name is settings.js – make sure the file is called this when places in here. Sometimes, if you download multiple files, your computer will add a number at the end of the file name, such as settings (1). To use the settings file in our scenes, we’d need to remove the (1), and ensure the file is just called settings.

Settings File in Proper Folder

Adding Your Scene Into OBS or Other Streaming Software

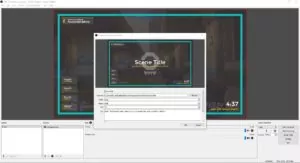
Add your scene into OBS, or whatever streaming program you use, so that we can see everything is working so far. For OBS, let’s add in a Browser Source. We’ll want to add a Local File, then hit browser to select the scene.html file that we’ll find in the “SceneMaker” folder.

Adding Scene Into OBS

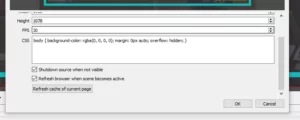
Set the Width to 1920 and Height to 1080. “Shutdown source when not visible” can be checked if you’d like. Make sure that “Refresh browser when scene becomes active” is checked. Once you hit okay, you should see your design so far.

Additional Settings for OBS

Linking the Labels Text Files

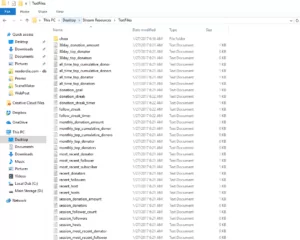
To properly link our StreamLabs Stream Label, Muxy Ticker text files, or any other program you may use to generate text files on your computer, we need to link things up properly.  The “Text Files” folder needs to be stored in your main folder, and will be used to pull your latest followers, tippers, and subs directly into the scene. So to be clear, my “Stream Resources” folder has the “TextFiles” and “SceneMaker” folder in it currently. This will allow us to use the text files folder for multiple scenes that we may create later.

The following step is optional, and only needed if you want your scene to display your stream supporters automatically – so if you don’t plan on having your latest followers or top tipper shown in your scene, or perhaps you don’t want to move your text files from where they are currently saved at, then you can skip ahead. All we need to do is set Stream Lab’s Stream Labels or Muxy’s ticker to save the files in the “Text Files” folder.

Text Files Proper Placement

Let’s quickly go over the steps for each program. Remember, if you use these programs already, you’ll have to go into your streaming program and update the file paths to your proper text files, or they will not be displayed – as they will be moved and no longer updated.

With StreamLabs Stream Labels

For Stream Labels, you will open the program, login and click “change output directory”. Then, simply select the “TextFiles” folder. All your files will now be moved to this folder. You can go back into the settings generator and update the file path names if needed.

Remember, if you update your settings.js file, that there is only one file in the settings folder with the proper name.

With the Muxy Ticker

With the Muxy Ticker, simply log in, click the settings tab, and then click the file directory. Navigate to where your “TextFiles” folder is saved and select that folder and hit “select folder”.

Text Files with Muxy Ticker

Adding cheers via Muxy Ticker is possible. You will need to add /cheer/TheNameOfTheFile . So, the most recent cheer using Muxy Ticker, will look like /cheer/most_recent_cheerer in the settings generator path.

Again if you update your settings.js file, that there is only one file in the settings folder with the proper name.

Replacing the Background Image or Video and Logo/Branding Image

Background Image or Video

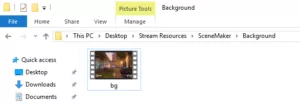
Go into the “Scene” folder and now into the “Backgrounds” folder. Here, you’ll need to put the image OR video that you want to use. You could also use a solid background color if you’d like – as shown in the changing color portion. In this folder I have included a default image called bg.jpg and video called bg.mp4. If you do not want to use this image or video, simply delete them. Now, you need to place in your own background image or video.

I highly recommend using one that is sized at 1920 pixels wide and 1080 pixels tall, otherwise you might see some distortion or skewing of the image/video when put into the scene maker. All that you need to do is make sure your image or video has the name of “bg”, and it will work. Images will accept .pngs and .jpgs, videos will work with .mp4s and .oggs. Let’s say you want to use a jpg, make sure it’s called bg.jpg and it’s the only file in this folder. For a video that’s a .mp4 it would be named bg.mp4 and put in this folder.

Changing Background Images or Videos

Alternatively, you could delete all images and videos in the background folder, and then simply add your background image or video playlist into OBS directly. However, you wouldn’t get the background blur effect without adding a filter to it in OBS Studio.

For example, if you delete the background images completely, you could put your gameplay capture behind this scene in OBS, and create a cool overlay while you wait for a queue to pop.

Logo/Branding Image

For the logo or branding image, the same type of thought process applied. Again, if you don’t want to add an image here, you don’t have to. Let’s go to the “Logo” folder, and drop in the logo you’d like to use – this one will need to be a .png file. There’s plenty of online image converters, such as TinyPng, and I do recommend higher res images here. Somewhere around the 1000 pixel by 1000 pixel mark.

Creating Multiple/Different Scenes

With that, you can refresh one final time and see your scene in all its glory! Take a quick moment to double check that everything looks great. Let’s talk about how easy it will be to make multiple scenes now.

To do so, all that you’d need to do is go into the main folder, copy and paste the “SceneMaker” folder. You can rename this folder anything you’d like. For example, I’ll just call this one “BRB”. Now, simply update your settings as needed – perhaps you’d like the title and subtitle to say a different message. Maybe you don’t want the countdown shown here.

Making New Scenes

Download, and then take the new settings file and place it in your new scene’s settings folder. Just make sure you override the old file if it’s in there. Make sure the file is named “settings” and not something like settings (1) or (2).

Finishing Up

This is quite a long post, but again, this is something we put a lot of work into. We want you to have as many options as possible so that you could customize this to your needs. If you enjoy this type of product let me know by sharing or commenting.

If this kind of thing is popular, I will be happy to make more like it, and even better ones in the future.

The post Free Scene Maker – Make Your Own Intro, Brb, and Outro Scenes appeared first on Nerd or Die.

Twitch Halloween Overlays

$
0
0

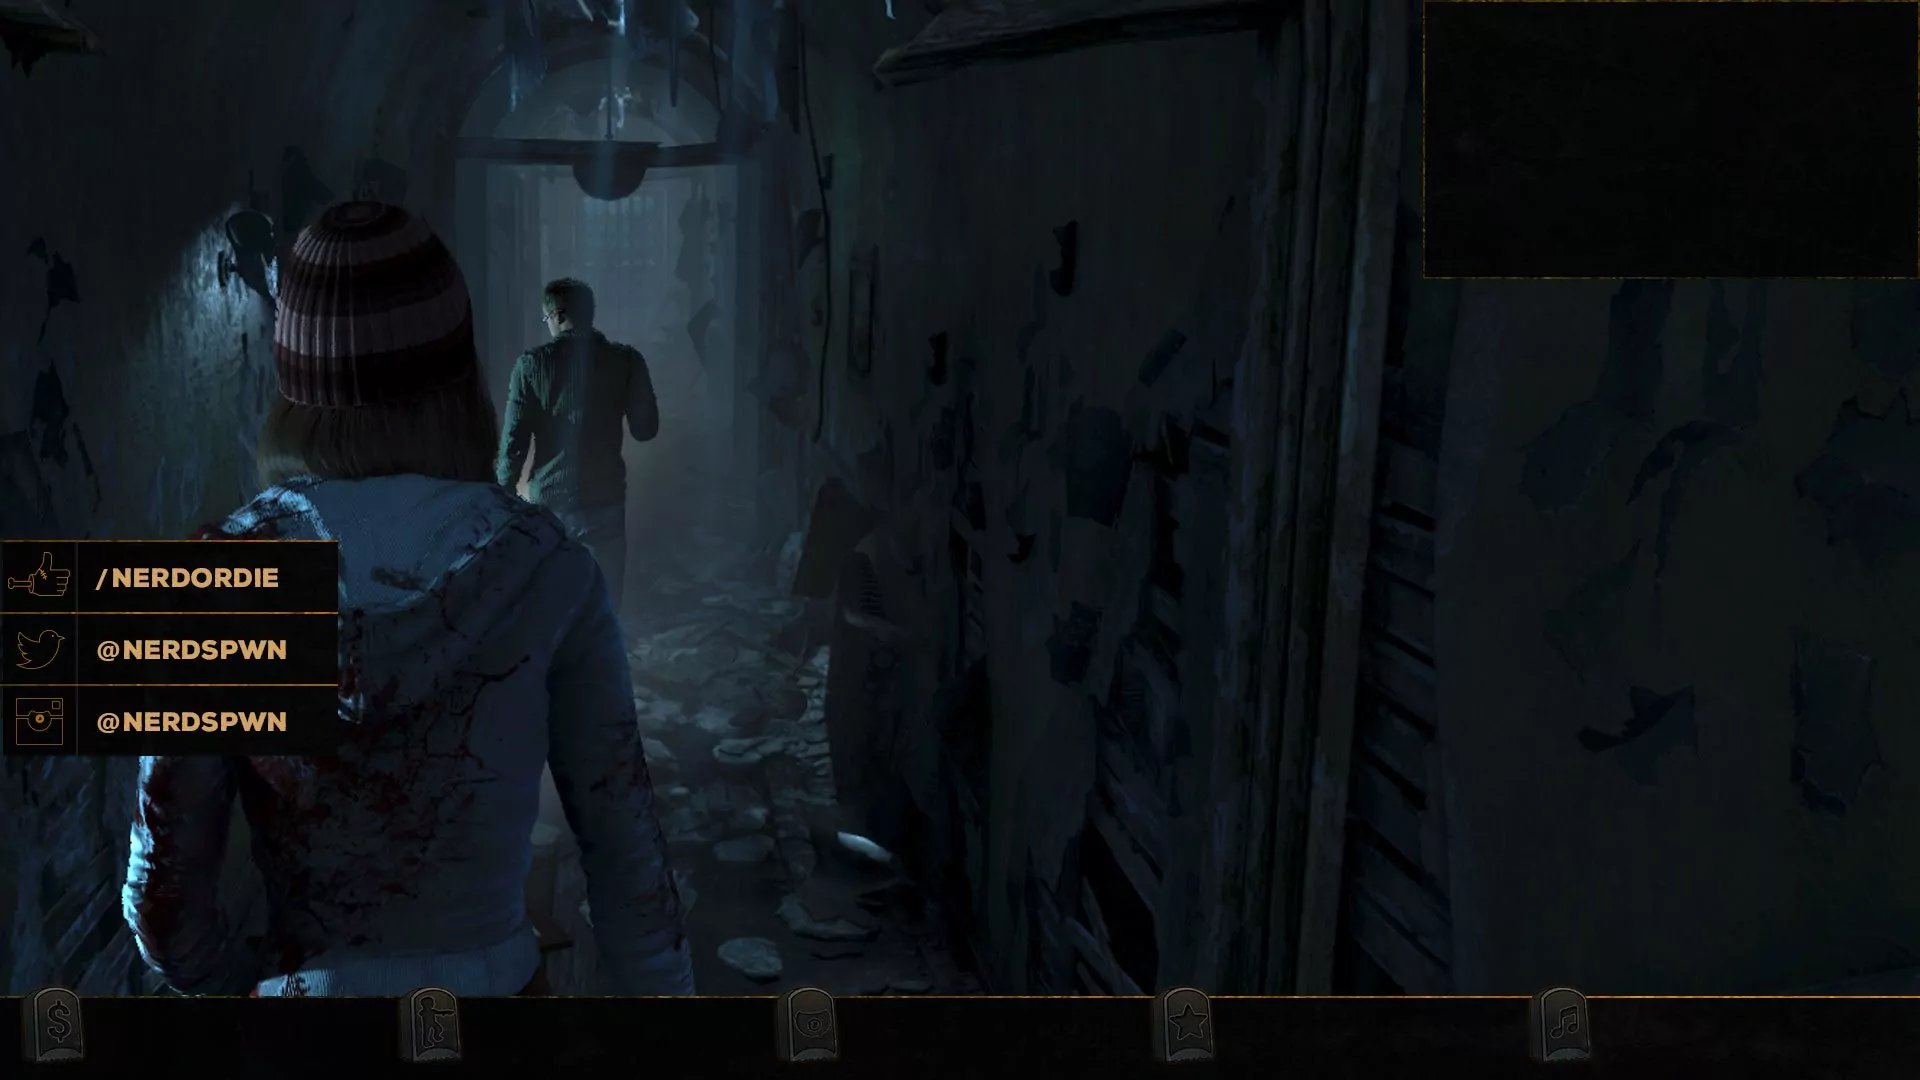
The spooky times are upon us, and to celebrate Halloween ,we’d like to release free overlays that were designed specifically for Halloween. Currently we have two different styles to choose from. The first is a webcam and alert pack, and the second is a simple image pack that’s separated by each piece of the overlay, so that you can pick and choose which graphics you’d like to use for your own overlay.

Wicked Alerts and Overlay

Trick or treat yo’ self with our free Halloween overlay and alert pack! The Wicked pack features 6 unique and fully animated alerts that can be used with or without the webcam frame design.

Download Wicked

Free Halloween Overlay

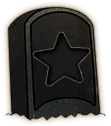
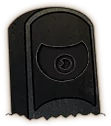
Our classic overlay that includes gravestones, social media panels, backgrounds and a webcam frame. Download only the assets that you need!

Download the Files

Downloading the Files

Right click any of the files that you would like to use, and then click “Save Image As…” to download each file. Store these files somewhere on your computer, and then add into OBS Studio, Streamlabs OBS, XSplit, or OBS.Live.

Adding the Files into OBS Studio, XSplit, and Other Streaming Software

To add these files directly into your streaming software, simply create any new scene and add each file as an image source. Once you’ve added all that you’ve like to use, you can re-position and resize the images exactly as you’d need.


Twitch Halloween Overlay Files

Want to download all these files at once? Get the free download here.

Subscribe Tombstone

Subscriber-Stone


Music Tombstone

Music-Stone


Host/Eye Tombstone

Host-Stone

Follower Tombstone

Follower-Stone

Donation  Tombstone

Donation-Stone


Facebook Like Tab

Facebook-Tab


Twitter Tab

Twitter-Tab

Instagram Tab

Instagram-Tab

Webcam Background

Webcam-Back


Bottom/Top Bar

LowerBar-Stone

Recommended Setups

Here’s a couple of examples of how I used these images to set up overlays for myself.

OverlayExample1
OverlayExample2

Thanks to Free Goodies for Designers for social icons used in this project.

The post Twitch Halloween Overlays appeared first on Nerd or Die.
Customizable Twitch Panels

$
0
0

Make customized Twitch Panels for free and without the assistance of Photoshop, GIMP, or any image editing software! This is my first customizable free resource and hopefully it’s one of many.  Choose your colors, icon, font size, text to include on the panel, and more!

These images are compatible as Mixer panels as well!

Free Twitch Overlays, Panels, and Alerts

Did you know that Nerd or Die makes a lot more free content for streamers? We also offer premium themes to help you upgrade your channel for a professional appearance.

View our shop

A huge shoutout to @Tehkhop for helping me out on a few parts of this small app.

Also, thanks again to Twitch.tv/Miisty (follow her on Twitter @Miistymiisty) for letting me use her base design in this project.

How to Customize Your Twitch Panels

Watch the video or read the instructions below.

  1. Use the input controls to design your panel.
  2. Right click the panel and select “Save Image As…”
  3. That’s it!  You’re ready to upload them to Twitch!

Use the app inputs to make the panel look exactly the way you’d like it to!  I recommend that you start with the panel with the longest panel text.  So if you’re making two panels with the text “Subscribers”, “Donate”, and “About Me”, you should start with the “Subscribers” panel, as it takes up the most horizontal space.

You want to do this so that your font sizes and text alignment are all the same.  However, if you don’t want to have the same font sizes, that’s fine too!

Options Available

The follow options are currently available for this app:

  • Left Side Color – This input is done through a color picker. Changing this color will change the background color of the box on the left side. This is the box that contains the icon. By default it is set at #23b85e – you can use the pallette, HSL Slider, or color input to select your color.
  • Right Side Color – This input is done through a color picker. Changing this color will change the background color of the box on the right side. This is the box that contains your panel text.  By default it is set at #101220 – you can use the pallette, HSL Slider, or color input to select your color.
  • Text Color – This input is done through a color picker. Changing this color will change the text color of your panel text. By default it is set at #ffffff – you can use the pallette, HSL Slider, or color input to select your color.
  • Panel Text – This input field controls the text to be included on your panel.  The text will be updated as you type.
  • Icon – The icon dropdown will change the image displayed on your stream panel.  Simply choose any of the pre-made icons and it will be updated on your panel automatically.
  • Text Size – Use the text size slider to select how big you would like your panel text.
  • Text Vertical Align – The text vertical align slider can be used to move your text along the Y-axis.  This option is useful if you’d like to move your text towards the top or bottom of the panel.  On some browsers the text will not be automatically aligned to the middle.
  • Add Padding – For some Twitch panels you will like “padding” or empty space on the bottom of your panels to add space between your image and text that you may be putting underneath it.  Selecting Yes will show the checkerboard, which indicates that there will be empty space added underneath the panel. No will remove the padding and the image will include no empty space on the bottom.
  • Font Family – Allows you to manually set a font of your choosing.  Simply type in the name of any font that you have installed on your local system.

Should I add padding?

The easiest way to make your panels look great, is to “Yes” for padding if the image will be a link.  If the image will not contain a link, then select “No” for padding.

Padding Example
An example of your images with and without padding, as links and non-links.

Please let me know if you have any problems with this app!

If you’re experiencing any issues, please let me know in the comments below.  It will be much easier for me to add icons to this system, versus my previous post.

Looking for Mixer panels?

We got you covered! These panels can be used with your Mixer profile as well! Simply download the images needed as normal, and upload to your Mixer account.

Updates

  • Added support for mobile scrolling on webkit devices.
  • Added text box for font input.  This allows users to enter any font they have installed on their system with these panels.
  • Added support to directly input color code into the color picker.
  • (03/08/16) – Added Game Wisp, Crown, Snapchat icons.
  • (03/13/16) – Added Plays.TV, Tumblr, DeviantArt, Keyboard, Mouse, Battle.Net icons.
  • (03/25/16) – Added Playstation, Xbox, Pokemon, PayPal, Extra Life, UPlay, and Thumbs up icons.
  • (07/17/16) – Added download button and file name input.

The post Customizable Twitch Panels appeared first on Nerd or Die.
Free Overwatch Twitch Panels

$
0
0

We’re very excited to bring you our newest free resource – Overwatch Twitch Panels! With this free resource you can customize and save your own unique panels, using only a web browser. We designed this with our Animated Overwatch Overlay and custom notifications in mind, so if you’re using those, it should fit in nicely with your stream design.


Having trouble viewing this app? Click Here.


How to Customize Your Overwatch Twitch Panels

  1. You can watch the video at the top of this post or read the instructions below to design and customize your panels.
  2. When finished, use the filename input and download button to save your panel to your computer.
  3. Enjoy! You can now upload the saves file to your Twitch page.

Example Panel Designs

Free Overwatch Twitch Panel Free YouTube Twitch Panel Free Instagram Twitch Panel Free Steam Twitch Panel Free PayPal Twitch Panel Free Xbox Twitch Panel

Options Available for the Overwatch Twitch Panels

  • Icon color – Click inside the color selector box to choose the color of the icons. Palette colors are available on the left side. The right side has options for color slider boxes to get a more unique color. You can also use the input box below to enter in an exact color hex code if you’d like. For example, #FFFFFF will yield white.
  • Text color – This works just like the icon color option, but controls the color of the text on the panel. It is recommended to choose a color that has contrast with the background. This will make it easier to read.
  • Background color – A drop down option that allows you to select different background panel designs. More color options maybe be added in the future. Let us know what colors you’d like to see in the comments below.
  • Badge color – A drop down option that allows you to choose a color for the area surrounding the icon. Again, there is only a few options here – so make sure to check back for any updates to this if the color you’d like to see isn’t added just yet.
  • Panel text – A text input box allows you to set what the text says. When designing panels it is usually recommended to startwith the longest word, in order to keep text sizes uniform.
  • Icon dropdown – I can simply select the Twitter, and it will swap in the Twitter icon. You’ll probably notice a list of icons – but please let me know if you think we left any out that are important to streamers. I made sure to put in a “blank” icon – for all of you that use Photoshop, Gimp, or similar, and want to take this design to the next level. We also included a Nerd or Die icon in the list – in case you’d like to credit our site or YouTube channel in anyway, we always appreciate that.
  • Font Family – A text input box that allows you to set the font to use for your panel text. By default Oswald is entered here. Any font installed on your system will work in the input box. Please note that it spaces are generally not required and maybe cause your font to not load properly. For example, if you install the font Big Noodle Titling on your system, the correct input will be BigNoodleTitling – you may need to restart your browser with any new fonts used.
  • Text Size – Range slider input that increases or decreases your text size.
  • Text Horizontal Align – Range slider input that changes the horizontal positioning, or left and right positioning of the text. By default it’s set to 130px.  With italic text you may want to move the input down just a bit.
  • Text Vertical Align – Range slider input for the vertical, or up and down, positioning of the text.
  • Filename and Download Button – A text input and button. You can save the file by entering a filename in this last text box, and then hitting download. For example, if you enter twitter into the text input box and hit download, we’ll have a file named twitter.png saved on our computer. If you’re experiencing any issues with the download button, you can also right click the panel, and click “save image as…” but of course using the button with the filename is recommended.

Have any recommendations or issues with the app? Let us know!

We’d love to improve this app even further so feel free to comment on this post to let us know what you think is missing! Please leave any troubleshooting issues in the comments below, as others may have similar problems. Let us know what icons and color combinations are missing… or perhaps we might even do new badge styles as well!

The post Free Overwatch Twitch Panels appeared first on Nerd or Die.
Viewing all 27 articles
Browse latest View live